Exterior Design Before and After: How We Transformed Astrid’s Home
- Beril Yilmaz

- Oct 7, 2024
- 3 min read
Updated: Oct 23, 2025
Designing the exterior of a home can be as impactful as a full interior renovation. When Astrid approached me with her vision for her home's exterior, she wanted subtle yet effective changes that would modernize the look without losing the character of her home. What started as a modest project turned into an exciting transformation that enhanced both the curb appeal and functionality of her house.


Exterior Design Before And After : Start with a Vision and 3D Models
Astrid had clear ideas about what she wanted: she loved the bones of her home but felt it needed a fresh update, particularly with the color palette. She wanted small changes that would make a big impact. So, the first step in this "exterior design before and after" process was creating multiple 3D renderings of different design concepts.

These visualizations helped Astrid to better understand how the color changes would look in real life, ensuring that every detail fit her vision perfectly. I presented her with several options—some bold, some subtle—and it wasn’t long before we had honed in on a specific look.
Exterior Design Before And After : Modernizing the Stone Color
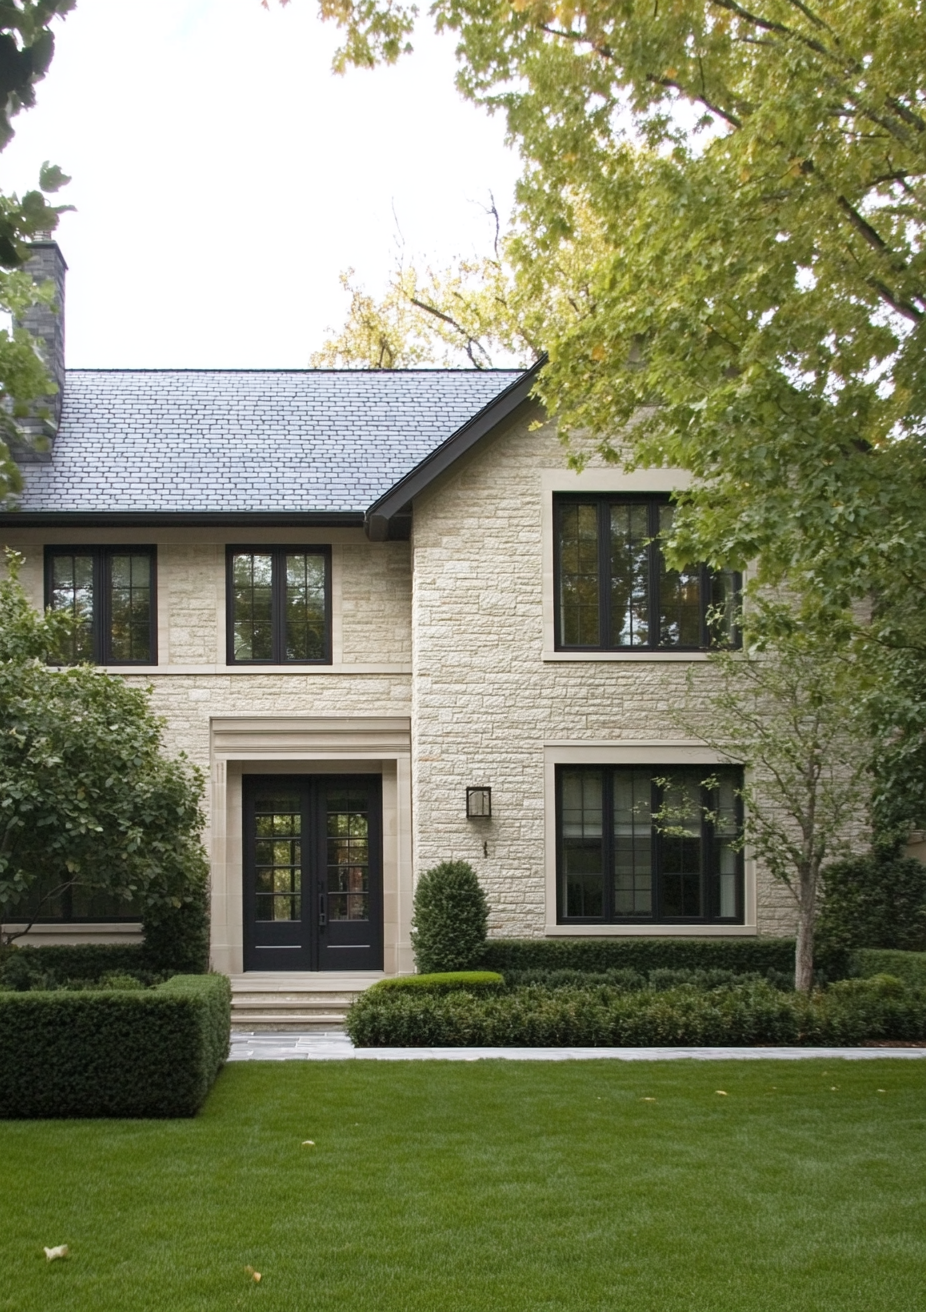
One of the most significant elements Astrid wanted to update was the stone color. Her home originally had a natural stone facade that felt dated. While the texture of the stone was beautiful, the color no longer matched the modern aesthetic she was after. I suggested a neutral-toned stone in soft grays and warm beige to bring a fresh, organic modern feel to the exterior. These tones not only modernized the look but also softened the harshness of the previous stone’s color.

The 3D designs allowed her to see how different tones would interact with the landscaping, light, and overall style of her home, and she confidently chose the option that felt the most harmonious.
Exterior Design Before And After : The Trim Color Refresh
Another small but impactful change was updating the trim color. The trim, which had previously been a faded white, was replaced with a warm, creamy shade that added a sense of sophistication without overwhelming the design. We chose a color that blended seamlessly with the new stone and brought out the natural textures of the house's exterior.

Through the 3D models I created, Astrid could see how the new trim color would complement the stone in various lighting conditions. It was crucial for her to be sure that this change felt right from every angle and at different times of the day.
Exterior Design Before And After : A Cohesive Landscape and Design
Astrid's home is nestled in a beautiful lot surrounded by nature, and it was essential that the new exterior design feel cohesive with the landscape. Once the stone and trim colors were finalized, I worked with her to select additional design elements that would enhance the overall look. We kept the landscaping in mind throughout the process, ensuring the exterior design flowed seamlessly into the surrounding nature.

Subtle details like modern lighting fixtures, updated house numbers, and a new mailbox gave the home that extra touch of sophistication. The materials and colors we chose not only enhanced the home’s exterior but made it stand out without disrupting the natural beauty around it.

If you're looking to transform your home’s exterior, whether it’s a simple refresh or a full redesign, working with a professional can make all the difference. Just like with Astrid, I can create 3D renderings to help you visualize the potential of your home. Ready for your own exterior transformation? Let’s get started today and bring your vision to life!
Frequently Asked Questions
Q: How long does the exterior design process take?
A: The process can vary depending on the scope of the project. For Astrid, the initial design and material selection took a a week, followed by the actual implementation. I make sure to work closely with my clients to ensure the timeline fits their needs.
Q: Can I make changes after seeing the 3D models?
A: Absolutely! The 3D models are designed to give you a realistic preview of the design. You can adjust colors, materials, and details before any work begins to ensure everything is perfect.
Q: How much input will I have in the design?
A: I work collaboratively with my clients, ensuring that their vision is always the priority. While I offer professional guidance, your preferences are central to the design process.


Comments